Showing posts with label template. Show all posts

Browse > Home / / My Last and Fresh Converted Blogger Template


My Last and Fresh Converted Blogger Template

2 comments
Friday, September 25, 2009 Posted by One-4-All

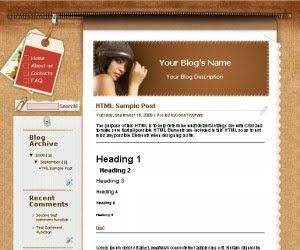
I have converted several wordpress template into blogger template. There is a new converted template that i was known. I am proud to provide converted wp themes for blogspot. As you know, wordpress have a nice templates. I hope my work will help you to choose a nice template for your blog.

There are a new list my published template:

  1. CoolRetro Blogger Template
  2. CoolRetro Blogger Template
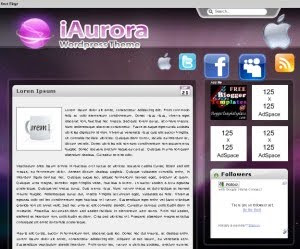
  3. iAurora Blogger Template
  4. iAurora Blogger Template
  5. Fashion Blogger Template
  6. Fashion Blogger Template
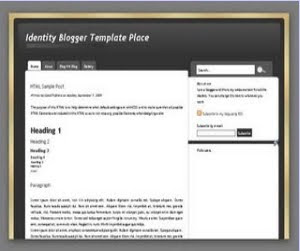
  7. Identity Blogger Template
  8. Identity Blogger Template

Hope you like this template.

Best Regard

One-4-All | Blogging News and Tips

Read More

Browse > Home / / Milano Blogger Template Installation


Milano Blogger Template Installation

2 comments
Wednesday, September 02, 2009 Posted by One-4-All

I have published a new template in gallery template blog, with name Milano Blogger Template. Now, i would to make a tutorial to install this template into your blogger.

TouchRiver Blogger Template Installation Wizard
  • Upload Template Wizard
    1. Log in to your Blogger dashboard and go to Layout >> Edit HTML
    2. Remember to back up your old template. To do this, click on the "download full template" link and save the file to your hard drive.
    3. Look for the section near the top where you can browse for your XML template.
    4. Enter the location of your template and press "upload"
    5. The HTML of your new template will now appear in the box below. You can preview your template or simply save to start using it!
    6. Done. Enjoy!
  • Widget Installation Wizard
    1. Slider Widget Content
    2. There 2 area in slider content, Description widget and Slider Widget. Go to "Page Elements", and you will see the slider area at the top. There are two add widget link in slider area, widget for Slider and widget for description.
      Click that link to add a widget. When you want to add that widget, you should add this code to make it works.
      Skider Widget Code
      <ul>
      <li>
      <a href="Your Link URI"><img alt="" src="Your Image URL&amp;h=240&amp;w=520&amp;zc=1"/> </a>
      </li>
      <li>
      <a href="Your Link URI"><img alt="" src="Your Image URL&amp;h=240&amp;w=520&amp;zc=1"/> </a>
      </li>
      <li>
      <a href="Your Link URI"><img alt="" src="Your Image URL&amp;h=240&amp;w=520&amp;zc=1"/> </a>
      </li>
      </ul>
      You can use description area for anything you like it. I have use it for my self description.

    3. Tabber sidebar
    4. To add widget in tabber sidebar was same as your add another widget in blogger template. But to change tabber title, you must go to your template and look up for this code like in this image.
      The grey line in that picture are title in the tabber sidebar. You can change it for get another title in your tabber.
    5. Subscribe Widget Setting
    6. I was used another style of feed subscribe form for my blog.If you want to use this subscribe form style, just copy this code and paste it into HTML/Java Script Widget.
      div class="rss_box">Sign up to receive breaking news as well as receive other site updates!</div>

      <form id="rss_form" action="http://feedburner.google.com/fb/a/mailverify" target="popupwindow" method="post" onsubmit="window.open(&quot;http://feedburner.google.com/fb/a/mailverify?uri=Your Feed ID&apos;, &apos;popupwindow&apos;, &apos;scrollbars=yes,width=550,height=520&apos;);return true"> <input id="email_rss" onfocus="if (this.value == &quot;Enter your email address...&quot;) {this.value = &quot;&quot;;}&quot; value=&quot;Enter your email!&quot; name=&quot;email&quot; onblur=&quot;if (this.value == &quot;&quot;) {this.value = &quot;Enter your email!&quot;;}" name="email" type="text"/>
      <input id="subscribe_email_btn" value="" name="subscribe_email_btn" type="submit"/><input value="Your Feed ID" name="uri" type="hidden"/><input value="en_US" name="loc" type="hidden"/>
      </form>
      <p><a href="http://feeds.feedburner.com/Your Feed ID" rel="nofollow"><img width="88" style="border:0" alt="" src="http://feeds.feedburner.com/~fc/Your Feed ID?bg=66CCFF&amp;fg=444444&amp;anim=0" height="26"/></a></p>


    7. Banner 125X125 Area
    8. In this template also was provide for banner 125X125 area. To make it more good looking in your template, add <ul> and <li>. Look up for my banner code that i have installed in my demo.
      <ul><li>Banner Code</li>
      <li>Banner Code</li>
      <li>Banner Code</li>
      <li>Banner Code</li></ul>

    9. Navigation Link setting
    10. In navigation area, you can make sub-page and sub-subpage link. I think you have already know about it. But for someone who doesn't know about it, i will write how about make sub-page and sub-sub page link. Look up for this picture.In that picture you can see the navigation with sub-page and sub-subpage. When you want make a navigation link which doesn't have sub-page, you must use this code.
      <li class='page_item'><a href='Link' title='Page Title'>Page Title</a></li>. But when you want make a link which have sub-page and sub-subpage, you must use this code.
      <li class='page_item'><a href='' title=''>Page 1</a>
      <ul>
      <li class='page_item'><a href='' title=''>SubPage 1</a>
      <ul>
      <li class='page_item'><a href='' title=''>Sub-SubPage 1</a></li>
      <li class='page_item'><a href='' title=''>Sub-SubPage 2</a></li>

      </ul>
      </ul>
      </li>

I hope this installation template wizard can help you to use Milano Blogger Template.
And this template was installed avatar blogger comments, please read this tutorial to make it works on your blog. Install Avatar in Blogger Comments

Best Regard
One-4-All

Read More

Browse > Home / / TouchRiver Blogger Template Installation Wizard


TouchRiver Blogger Template Installation Wizard

12 comments
Friday, August 28, 2009 Posted by One-4-All

Yesterday i was publish a new converted WP template in my gallery template blog. Now, i would to make a tutorial to install this template into your blogger. I think for the first in this tutorial, i would to rewrite a feature in Touch River Blogger Template.
This template have main feature.
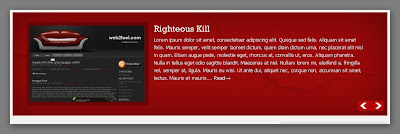
  1. Slider Content Gallery Feature
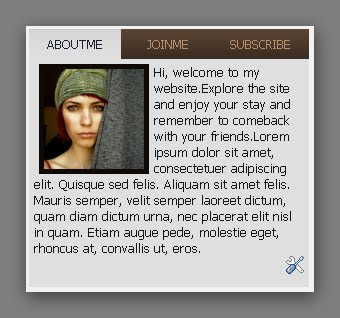
  2. Tabber Sidebar Featured
  3. Summary ReadMore Feature
  4. Feed Subscription Image
TouchRiver Blogger Template Installation Wizard
  • Upload Template Wizard
    1. Log in to your Blogger dashboard and go to Layout >> Edit HTML
    2. Remember to back up your old template. To do this, click on the "download full template" link and save the file to your hard drive.
    3. Look for the section near the top where you can browse for your XML template.
    4. Enter the location of your template and press "upload"
    5. The HTML of your new template will now appear in the box below. You can preview your template or simply save to start using it!
    6. Done. Enjoy!
  • Widget Installation Wizard
    1. Slider Widget Content
    2. Go to "Page Elements", and you will see the slider add widget at the top. There are two add widget link in slider widget area, widget for image and widget for description.

      Click that link to add a widget. When you want to add that widget, you should add this code to make it works.
      widget for image code
      <ul>
      <li>
      <img alt="" src="Your Image URL&amp;h=200&amp;w=300&amp;zc=1"/>
      </li>

      <li>
      <img alt="" src="Your Image URL&amp;h=200&amp;w=300&amp;zc=1"/>
      </li>

      <li>
      <img alt="" src="Your Image URL&amp;h=200&amp;w=300&amp;zc=1"/>
      </li>

      </ul>

      widget for description code
      <ul>
      <li>
      <h2><a href="Your Link Article" rel="bookmark" title="Your Title">Your Title</a></h2>
      <p>Description Text....&nbsp;<a href="Your Link Article">Read&rarr;</a></p>
      </li>

      <li>
      <h2><a href="Your Link Article" rel="bookmark" title="Your Title">Your Title</a></h2>
      <p>Description Text....&nbsp;<a href="Your Link Article">Read&rarr;</a></p>
      </li>
      </ul>
    3. Tabber sidebar
    4. To add widget in tabber sidebar was same as your add another widget in blogger template. There another different way. But to change tabber title, you must go to your template and look up for this code like in this image.
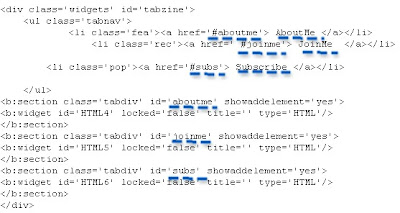
      The dash blue line in that picture are title in the tabber sidebar. You can change it for get another title in your tabber.
    5. Feed Setting
    6. I was set this into blogger feeds, for example http://all-iknow.blogspot.com/feeds/posts/default.
      If you want to change it into your FeedBurner Subscription Link, just go to your "Edit HTML" and then try to find this code.
      <div class='rssbox'>
      <a href='/feeds/posts/default'><img alt='Subscribe to My Blog' src='https://blogger.googleusercontent.com/img/b/R29vZ2xl/AVvXsEh3Dl6ETs2z_vJy8_w1UDd54zOkuDCPyiKwfBMiFXRjtrWDgRNdyrv3mOa91X5LcVJpVyF07UoDpN5eEytLXIRfh3LBGyFgIj9TO38On38wW7DAvAQt94CQ2aeFzL_5juiZ-6bpmJHctVU/s1600/rss.png'/></a>
      </div>
      Change " '/feeds/posts/default' " with your FeedBurner subscription link.


I hope this installation template wizard can help you to use TouchRiver Blogger Template.

Best Regard
One-4-All

Read More