I have published a new template in gallery template blog, with name Milano Blogger Template. Now, i would to make a tutorial to install this template into your blogger.
TouchRiver Blogger Template Installation Wizard
I hope this installation template wizard can help you to use Milano Blogger Template.
And this template was installed avatar blogger comments, please read this tutorial to make it works on your blog. Install Avatar in Blogger Comments
Best Regard
One-4-All
TouchRiver Blogger Template Installation Wizard
- Upload Template Wizard
- Log in to your Blogger dashboard and go to Layout >> Edit HTML
- Remember to back up your old template. To do this, click on the "download full template" link and save the file to your hard drive.
- Look for the section near the top where you can browse for your XML template.
- Enter the location of your template and press "upload"
- The HTML of your new template will now appear in the box below. You can preview your template or simply save to start using it!
- Done. Enjoy!
- Widget Installation Wizard
- Slider Widget Content
- Tabber sidebar
- Subscribe Widget Setting I was used another style of feed subscribe form for my blog.
- Banner 125X125 Area In this template also was provide for banner 125X125 area. To make it more good looking in your template, add <ul> and <li>. Look up for my banner code that i have installed in my demo.
- Navigation Link setting In navigation area, you can make sub-page and sub-subpage link. I think you have already know about it. But for someone who doesn't know about it, i will write how about make sub-page and sub-sub page link. Look up for this picture.
 There 2 area in slider content, Description widget and Slider Widget. Go to "Page Elements", and you will see the slider area at the top. There are two add widget link in slider area, widget for Slider and widget for description.
Click that link to add a widget. When you want to add that widget, you should add this code to make it works.
Skider Widget Code
<ul>
<li>
<a href="Your Link URI"><img alt="" src="Your Image URL&h=240&w=520&zc=1"/> </a>
</li>
<li>
<a href="Your Link URI"><img alt="" src="Your Image URL&h=240&w=520&zc=1"/> </a>
</li>
<li>
<a href="Your Link URI"><img alt="" src="Your Image URL&h=240&w=520&zc=1"/> </a>
</li>
</ul>
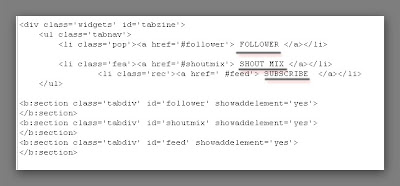
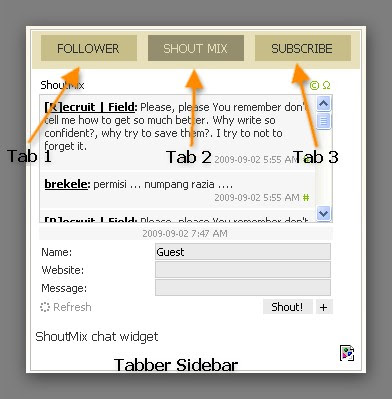 To add widget in tabber sidebar was same as your add another widget in blogger template. But to change tabber title, you must go to your template and look up for this code like in this image.
The grey line in that picture are title in the tabber sidebar. You can change it for get another title in your tabber.
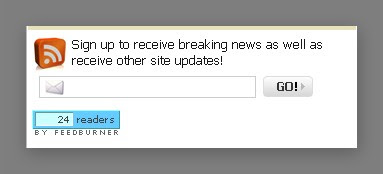 If you want to use this subscribe form style, just copy this code and paste it into HTML/Java Script Widget.
div class="rss_box">Sign up to receive breaking news as well as receive other site updates!</div>
<form id="rss_form" action="http://feedburner.google.com/fb/a/mailverify" target="popupwindow" method="post" onsubmit="window.open("http://feedburner.google.com/fb/a/mailverify?uri=Your Feed ID', 'popupwindow', 'scrollbars=yes,width=550,height=520');return true"> <input id="email_rss" onfocus="if (this.value == "Enter your email address...") {this.value = "";}" value="Enter your email!" name="email" onblur="if (this.value == "") {this.value = "Enter your email!";}" name="email" type="text"/>
<input id="subscribe_email_btn" value="" name="subscribe_email_btn" type="submit"/><input value="Your Feed ID" name="uri" type="hidden"/><input value="en_US" name="loc" type="hidden"/>
</form>
<p><a href="http://feeds.feedburner.com/Your Feed ID" rel="nofollow"><img width="88" style="border:0" alt="" src="http://feeds.feedburner.com/~fc/Your Feed ID?bg=66CCFF&fg=444444&anim=0" height="26"/></a></p>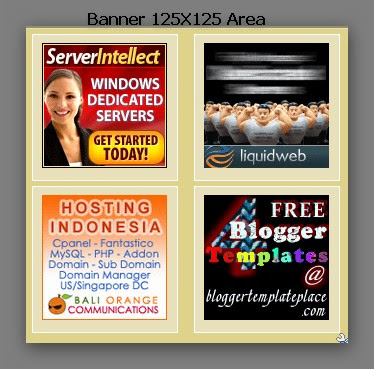
<ul><li>Banner Code</li>
<li>Banner Code</li>
<li>Banner Code</li>
<li>Banner Code</li></ul>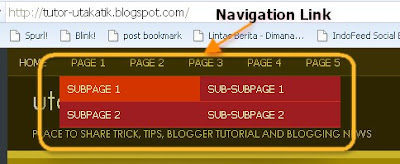 In that picture you can see the navigation with sub-page and sub-subpage. When you want make a navigation link which doesn't have sub-page, you must use this code.
<li class='page_item'><a href='Link' title='Page Title'>Page Title</a></li>. But when you want make a link which have sub-page and sub-subpage, you must use this code.
<li class='page_item'><a href='' title=''>Page 1</a>
<ul>
<li class='page_item'><a href='' title=''>SubPage 1</a>
<ul>
<li class='page_item'><a href='' title=''>Sub-SubPage 1</a></li>
<li class='page_item'><a href='' title=''>Sub-SubPage 2</a></li>
</ul>
</ul>
</li>
I hope this installation template wizard can help you to use Milano Blogger Template.
And this template was installed avatar blogger comments, please read this tutorial to make it works on your blog. Install Avatar in Blogger Comments
Best Regard
One-4-All


2 comments:
Hi, Thank for you Tutor.
I have some problem about this code
"Your Image URL&h=240&w=520&zc=1"
What do you mean?
wah, saya sebagai blogger baru merasa berterima kasih dah mau ngasih tutor bwat ngedit template yar lebih sip, thx
Post a Comment