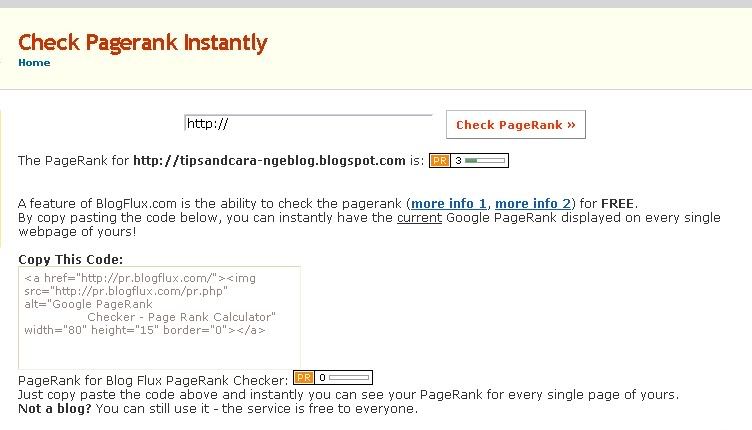
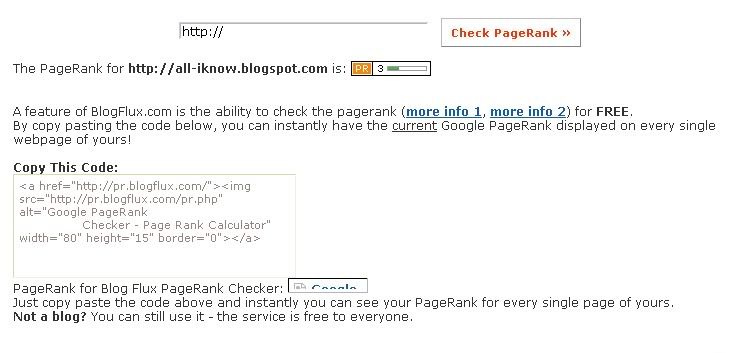
I feel Surprised ...... wonder .... and do not believe about something that happened to my blog. My PAGERANK was raised up. Last time my pagerank still was "0", and now become PR3. I can believe this was happened to my blog. Not one, but both of my blog was increased. This blog and my indonesian blog.... tipsandcara. And then i said, this is true???? or maybe just my imagination???? first i know about it in my SEO toolbar that was installed in my mozilla. And then i'm go to pagerank free service web to re-check about it, there is mypagerank.net, prchecker.info, googlepagerankchecker.com, and the result still same. Oh....thank God...my pagerank was increased.
There are the proof (click to enlarge).
But....Now i have more job to keep or to grow up it. I must make a great post again...and the one thing is not make my blog as spam blog. Because google doesn't like it.
I suggest you to check your blog, and hope you have same thing.
In my last article, i was posted some thick ops.... trick about adsense, there is adsense in blogger post and drop style adsense. It's all about to optimize your adsense for increase a click of your adsense. But, when i read a book about "Adsense Secret", there is a something else about tips for increase a clicks. This tips are about using color to optimize it. So...i call this article is "Using Colors To Increase Clicks".
1.Design Your Website To Highlight Adsense. I once went to a fashion show where each model wore the exact same black outfit for the entire duration of the show. Boring? Hardly! The show was intended to showcase platinum jewelry, and the outfits were designed to enhance the jewelry — instead of distracting the audience. You don’t have to make all the pages on your website identical (or black). But you do want to make sure that the look of your page draws attention to the ads — and makes them appear as attractive and as valuable as platinum jewelry. Many websites have strong graphic elements that catch the eye — usually at the expense of the AdSense units.
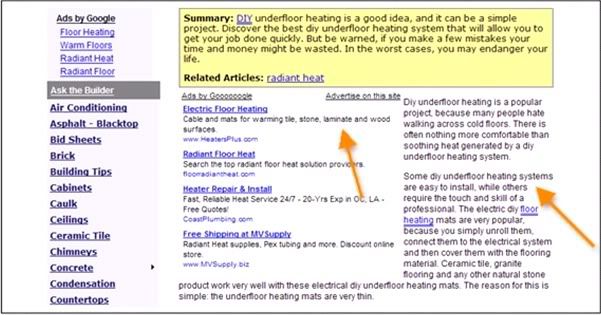
2. Make The Border Gone Ads with prominent borders make your pages look cluttered. They distract the eye from the ad text, while marking off the ad blocks from the rest of the content. Google provides an extensive color palette in your administrative area. Use it to tweak the look of your ads to suit your web page. With just one simple click, you can match the color of your ad's border with the background color of your web page. When the border blends with the background, it frees up loads of space. The page looks instantly neater and the ads look more inviting. Make sure you also pick a matching background color for the ad. The ad's background must match the page background on which the ad will appear. If the ad appears in a table, match the table background color with the ads background color. The key is to blend the background and border color with the page, so that the text looks like an integral part of your web content.
Look up for the example picture
3. Text Is Design Too The text size, font, color and the color of your ads must match the other text elements. If the text color of the ads is the same as the text in the body of your page, it’ll help the ads blend into the site and make the reader feel that you’ve endorsed them. And if the size of the font in the ads is the same as the size of the main body of the content, it will have the same effect: they’ll look like part of your site and not something brought in by Google. Too many text styles add clutter and can confuse your visitors. Instead, try every legitimate way to make the ads look like a part of your web content. In other words use the colors to make sure that your ads don't look like ads!
click for enlarge
There is a suggest for your adsense. But the most important thing is your blog/web have a high traffic.Hope this article can help us to get high clicks for our adsense.
Navigation bar or most often people said it Navbar is one of tools that is use to explore something. I use it to help a visitor to explore my blog. Almost template use it in horizontal style like this.
But i was used two type in my another blog.... tipsandcara, horizontal type and vertical type. My navigation bar in vertical type have appearance like this one:
When my visitor want to explore my blog, just click and list of my blog will appear.... like this one:
To use that style, there is a couple things to do.
1. click this link to download package that contain the script and image that used in this trick.
Upload all of in contain to your favorite web hosting (ripway, photobucket, hotlinkfiles, or something else). Write the URL, it will be use in next step.
2.Copy and paste this code to your template before </head>. Before you insert the code, you must change "your Script URL" with yours.
3.Copy and paste this code after ]]></b:skin> and before </head>.
there are several word that you must change. There is plus.gif, minus.gif, glossyback.gif, glossyback2.gif with yours URL of that image.
4.Go to layout template in blogger account, click "Page Element" and then click add a gadget. Click "HTML/Javascript" option. Inside that option, add this code.
Change that code with your own links. Save your template and see the result.
Blockquote is some section in web that it was often used to defined some important part. blockqute will indent the right and left margins both on the display. Some blogger used it to separated some code from another word of posting. We can make that blockquote look better and more interesting for anyone who look it. We can add line to our blockquote style.
Add this code to make your blockquote style like that style.
First you must upload this picture and copy and paste the url to the code. <-- This is the image you will need. Right click it then save to your desktop. Upload it to your webhost. That picture just suggest. You can change with a picture that you like........so it can be another style.
Just add the code in your template (before line </b:skin>), and now you have a new style of blockquote.
PayPal is an e-commerce business allowing payments and money transfers to be made through the Internet. PayPal serves as an electronic alternative to traditional paper methods such as checks and money orders. PayPal serves as an electronic alternative to traditional paper methods such as checks and money orders. Internet users can buy goods on ebay, software licensing, membership sites, business affairs, send and receive money to other PayPal users, and many other functions easily and automatically (usually because it automatically without human intervention in the process of order), and now the publisher adsense program such as Linkworth, aks2link, Ziddu, and the other is used Paypal for one of payment method.
Talk about sending and receiving of money, now bloggers can be install "Donate via Paypal" icon in their site. So, if there are people who want to give a money to you with easily. Just a few steps that must be do to install it. Guaranteed 100% Simple and easy.
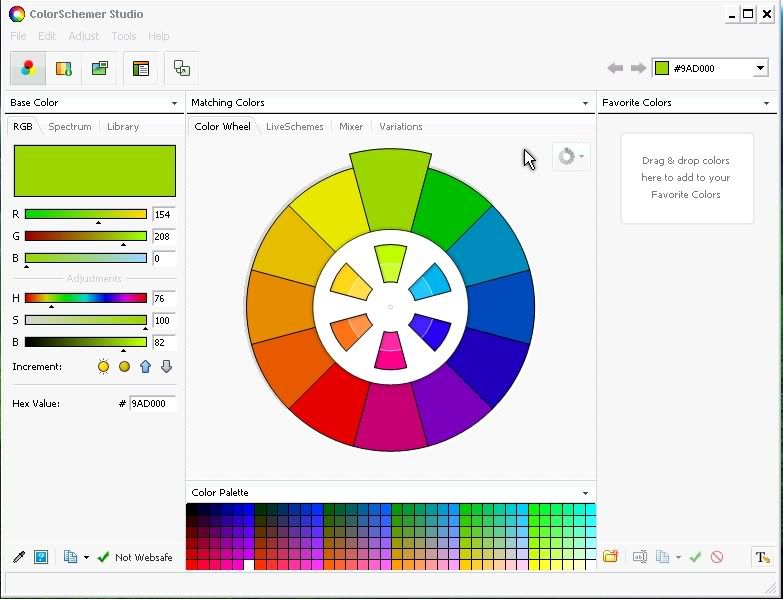
Color, all the people know it and use it. We always say that the color is red, the color is green, the color is yellow. And what relationship between color and blog? In blog, color often used, especially in our template. For some people who like customize their template, surely familiar with this case. However, most of the color is not spelled in red, green, or the other. But is called by using the hex code in the HTML code, for example: # 000000, # FFFFFF, and other.
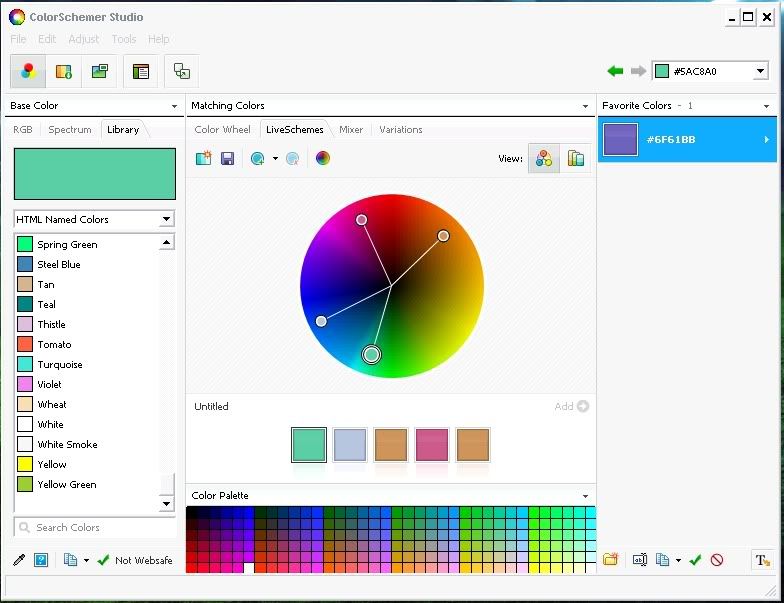
Black color have the code # 000000, or white color have a code # FFFFFF. Of course we can know all of about it. But don’t worry, now we can know the color code for all color by using the generator on-line and software. In this post, I would write about software that called "Color Schemer Studio".
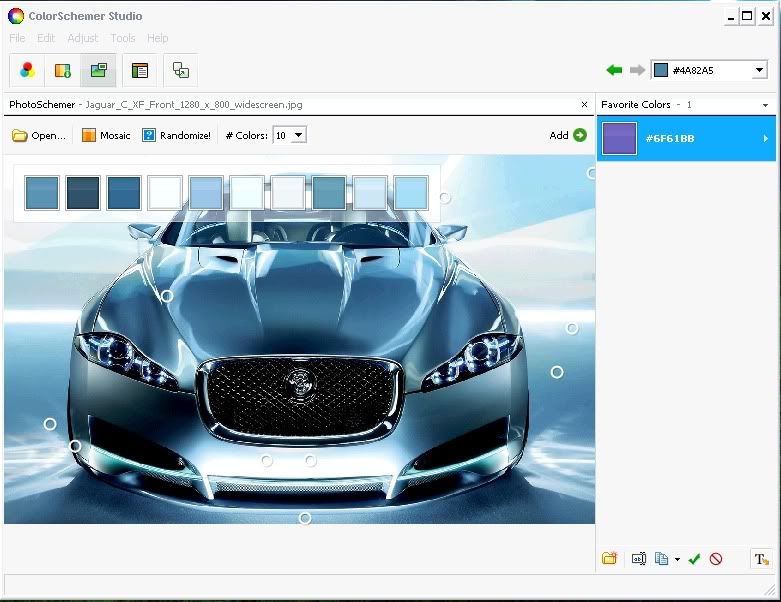
This software functions are as a generator of code for each color. In this software we just choose a color , and a code will appear. The most cool one...... we can generate a color code from color of image. What look like this software? See the picture below.
click image for enlarge
click image for enlarge
click image for enlarge
click image for enlarge
Interesting? if you would like to have it, just click to download. It's free and it's software was cracked.
Download Color Schemer Studio
This trick is often called the peek-a-boo read more style, which is not required loading a page to display a whole page article. This style will still show some of our articles, and hide some of the others. Visitors simply click the button to show the last of the article. To use this trick required javascript. The java script is required are:
Upload the script to the web hosting. Then copy the url of script.There are another some steps that need to use this trick.
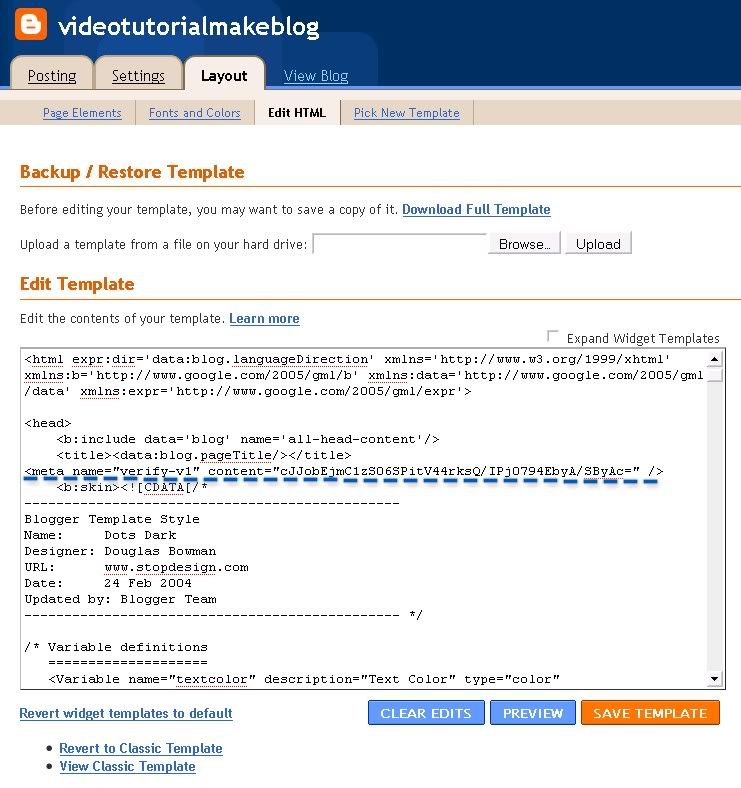
1. Sign in to your blogger account. 2. Click Layout --> Edit HTML. 3. First you must back up your template. 4. check "Expand Template Widget". 5. and then copy this code after <head>.
But before that change "URL SCRIPT" with your own 6. and then find this code
7. Change that code to become like this one
8. and then loking up for this code
9. Add this code right after that code.
so all code become like this one:
'Read All Article' dan 'Summary of Article' can be change with anything you want. 10. save your template. 11. Choose Setting Tab -->> Formatting 12. In "Post Template" area, type this code and save. <span id="fullpost"> </span> 13. Done....
One thing to remember, same with the other version of readmore ... when you writing an article, make that format become like this:
your summary <span id="fullpost"> your article until finis </span>
Read more is one of the trick in blog with have purpose to show a half of the articles are displayed. When visitors are interested in our article and would like to know more, they can read full article by click the "READ MORE" button option. But why we need this in my blog? Sometime we are make a long article. This will make our blog become long too, it caused a person who visited must scroll down their mouse if they want to know all about our blog. How if we have some important information for example adsense in some area....say it Footer Area, and our visitor won't to scroll down their mouse? I think our visitor will not see our information. Caused of this reason, i used this trick in my blog....... it become like this......
To use this trick, we are need several things to do.
1. Sign in to your blogger account.
2. Go to your layout.
3. Click "Edit HTML" button.
4. Cek Expand Widget Templates box.
5. Look up for this code
6. Add some code just below that code. The code that must be added are:
7. After you added that code, just below it, there are code like this
add this code after that.
8. Save your template.
One thing that most important to use this trick are when you make an article, you must make it like this one.
1. Use edit HTML method when you type your article. 2. Make article like this format,
What is a mean of "Drop Cap"? Drop cap style is a style that a first letter in your
post
become big. Like what a "Drop cap style" is? Drop cap style is like this picture.
picture 1. Drop Cap Style
And the how to apply this style in our post...? The way is so simple. First you must edit your HTML. Go to www.blogger.com and then log in to your blog. If you was log in, go to layout, and then click "edit HTML".
note Don't forget to check Expand Widget Templates
And then, save our template. Finish? not yet. A more little time to finish this Trix. Go to Setting > Formating. In post template, add this code HTML like this: But must be remembered, if we want this style appeare in our post, we must add code above in our post. like this. Now we can apply the Drop Cap Style
Last i was posted about feedburner. In my article, one of features in feedburner is "Email Subscriptions". This feature can Give your biggest fans another way to keep up with your blog or podcast feed by placing an email subscription form on your site. This feature can be put in your sidebar, footer, or another place that you want it to be placed. But there is another option, you can put it in your post. So, everyone who was read your article and like it, they can be choose to subscribe with easy way.
To put Email Subscription option under posting, there are a couple things that must be doing.
1. Go to your feedburner account.
2. Copy your "Email Subscription Code" and temporary paste it in another document sheet (notepad, wordpad, word, or another else).
3. Sign in into blogger account.
4. Go to "LAYOUT" option.
5. Click "Edit HTML".
6. looking for this code.
7. Paste your "Email Subscription Code" after that.
Sometime we feels boring about our blogger template. Sometime we want some more attractive template, sometime we want a more simple template.(I dream this thing)The most question is how to change it? How to make our eagerness become true? Now i want to share how to this. I will write some article about it.
Ok, to safe our time I will start it. First, we must have a template that will be use. we can download it from a web. For an example you can download in www.freetemplates.blogspot.com, or in this site www.finalsense.com, or in www.eblogtemplates.com, and many more site that offering a free template. but must be remember, sometime we download in zip file or rar file. we must extract first. After have a template, we must log in into our blog. I'm sure that we was know how to log in. Go to layout, and then go to "edit HTML", and then browse your template file. After that click upload. Wait it until upload process was finished. I suggess you take a rest for a moment, drink coffee maybe...,or make a call your friends, or something to relaxation your body.(just tips...)
Finish...?? if no one instruction on your monitor, it's mean your process was success. But if appear in your monitor, you must fix that instruction. for an example, if that was appear "More than one widget was found with id: Label1. Widget IDs should be unique", it means in your code, there is a two item (see the line word) with have a same number. You must make it different number. So, you must change the code.
I hope this article can be help for anyone, essepecially for a newbie like me.
Social bookmarking is a method for Internet users to store, organize, search, and manage bookmarks of web pages on the Internet with the help of metadata. It's use for users save links to web pages that they want to remember and/or share or it's can be use to promoted our blog. Some people that who read our article can use this service too. Many people was bookmark our article, of course our blog can be more famous. To give an easy way for our reader who want do that, we can put social bookmarking in our post. like this one..... bloggerplugins or in this one TipsAndCara.To insert social bookmarking in our post, just do some couple things.1. Insert script code into our template after <head> 2. Insert this one code too. first find <p class='post-footer-line post-footer-line-3'> by using ctrl+F. than just put this code below that.
3. Save your template and look up for result.Now in each your post, there was in social bookmarking like this.
Everyone who was used internet must be known "SEARCH ENGINE". What's Search Engine? search engine is one tool to search documents for specified keywords and returns a list of the documents where the keywords were found. Typically, a search engine works by sending out a spider to fetch as many documents as possible. Another program, called an indexer, then reads these documents and creates an index based on the words contained in each document. One of the most popular search engine is "GOOGLE SEARCH ENGINE".
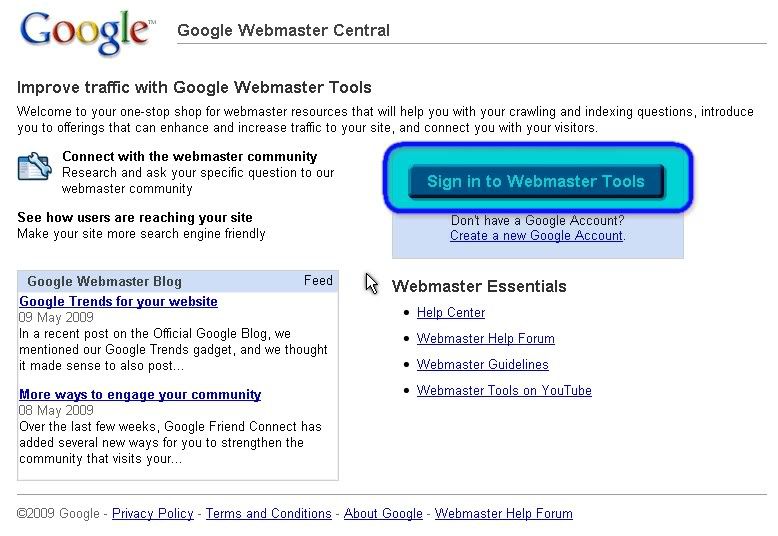
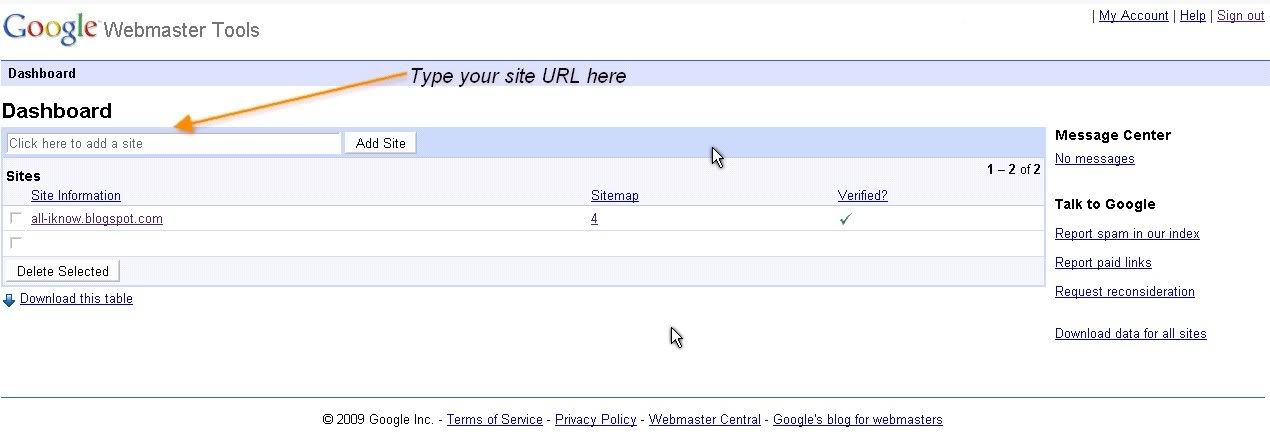
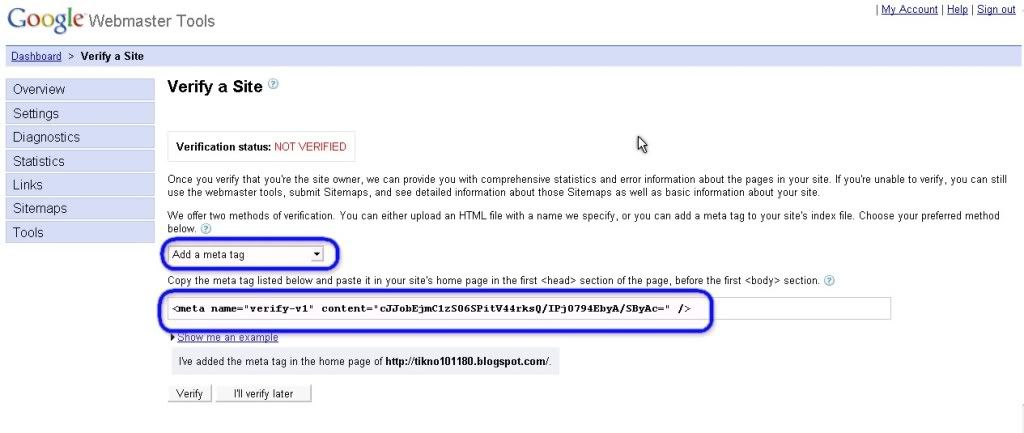
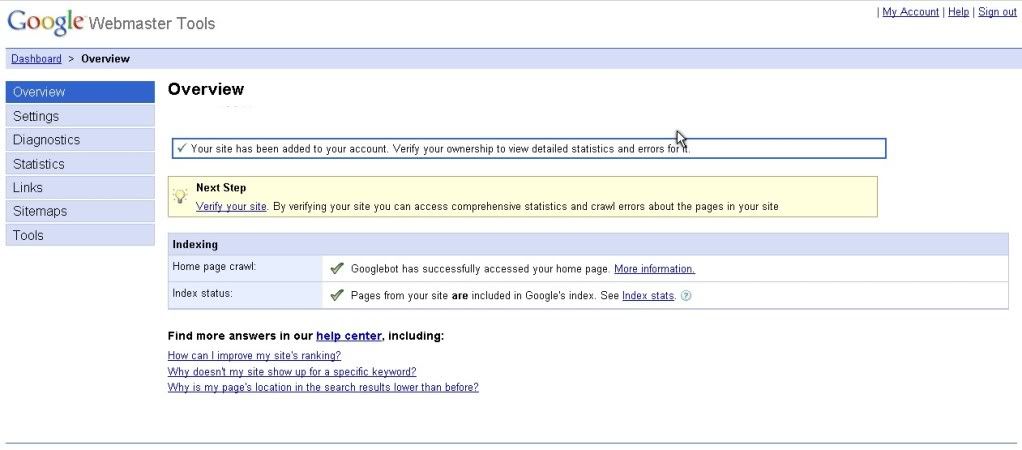
Search engines is one way the campaign or promoted our web / blog. How to indexed by search engine (in this case GOOGLE SEARCH)?. One of the answer is GOOGLE WEBMASTER TOOLS. What it is?
Google Webmaster Tools is a no-charge web service by Google for webmasters. It allows webmasters to check indexing status and optimize visibility of their websites. It has tools that let the webmaster: * Check and set the crawl rate * List internal and external pages that link to the site * See the PageRank of your site * See what keyword searches on Google led to the site being listed in the SERPs, and the click through rates of such listings * View statistics about how Google indexes the site * Submit and check a sitemap * Generate and check a robots.txt file
How to get this free service? there a several step to get this one. But, i think it's still simple way. 1. Go to Google Webmaster Tools Homepage (www.google.com/webmaster) 2. Sign In using your google account 3. Add your site (web or blog) 4. Verify your site that was added on google webmaster tools ( i suggest a simple way to verify is using "Add Meta Tag Method") 5. Add sitemaps (add with different type of sitemaps) 6. Waiting for a couple day until google indexing your site.
For more information, look up for this schemes picture (click to enlarge).
(picture of step 1 ~ step 6)
I hope this article useful for us. Best regard One-4-All
Feed is one of the media from our blog or web containing the contents of the blog or the web. But why our post need to become feed? Different thing between our blog and feed are in the content of both. Content of feed are 100% pure text and picture, no navigation, sidebar, adsense, and another widget. Feed needed for register in Google Webmaster Tools. Crawler bot needs feed.
Original feed in our blog must be have address http://addressblog/feeds/posts/default. Now we can redirect our original feed address to FeedBurner.
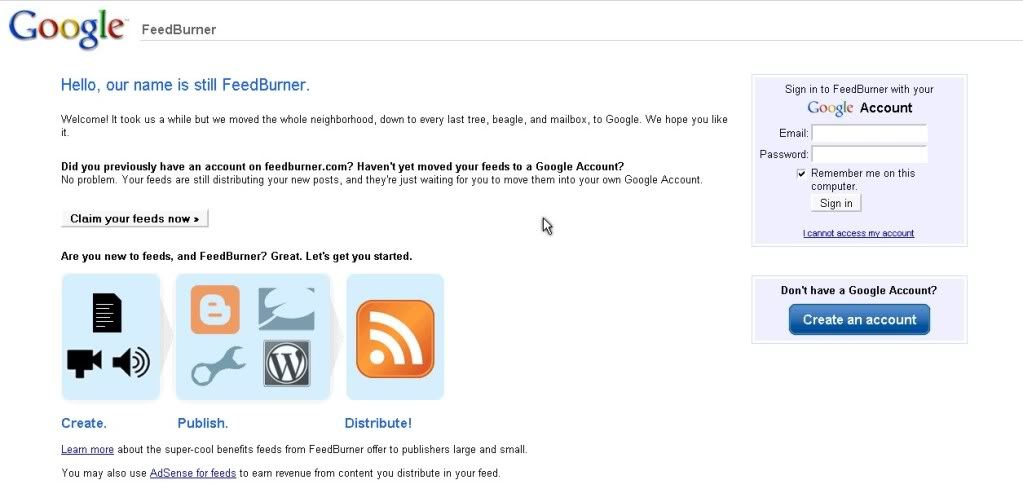
Why must to FeedBurner? with FeedBurner, we can get a lot of advantages. One of the advantages we can send our feed by email to anyone who was subscribe it. You can see another advantages in FeedBurner homepage. Now, I want to share how to register in feedburner.
For register in FeedBurner is so simple. Just go to FeedBurner homepage in feedburner.com which have homepage like this one.
Click to Enlarge
And then sign using your google account. Now, you can start to burn your original feed. Type your original feed URL in the box and then click "NEXT" button. Finish. Now your feed was redirect from yuor original feed to FeedBurner.
Click to Enlarge
With feedburner, you can publicize your feed with a lot of feature.
1. Headline animator
Headline animator is an animated banner that cycles through your feed's five most recent items , like this one:
2. BuzzBoost
BuzzBoost republishes your burned feed's content as go-anywhere HTML, Like this one:
3. FeedCount
FeedCount is another cool way to promote your feed. It is a dynamic graphic that always displays your feed's current circulation, as calculated by FeedBurner. 4. Email Subscriptions
This feature can Give your biggest fans another way to keep up with your blog or podcast feed by placing an email subscription form on your site. This feature will be appear like this one:
And many more feature that we can use to promote and optimize our feed.
After you was finished create your feedburner, don't forget to change your feed setting on your blog. Log in to your blog account, click "SETTING" tab, and then click "sitefeed". And change your orginally feed address (http://yourblogURL/feeds/posts/default) with FeedBurner URL.


 <-- This is the image you will need. Right click it then save to your desktop. Upload it to your webhost.


 Last i was posted about